Happy Labour Day everyone!
It's Anna here with you. Today I have two cards to show you, which I created using the Big Shot Plus Starter Kit. This is a Starter Kit where the possibilities are endless!
It's Anna here with you. Today I have two cards to show you, which I created using the Big Shot Plus Starter Kit. This is a Starter Kit where the possibilities are endless!
Who doesn't like butterflies? I wanted to show you how you can make some card really cute by keeping the card itself quite simple and adding a butterfly much decorative.
The butterflies are die-cut with three dies included on Starter Kit. It's been so much fun!
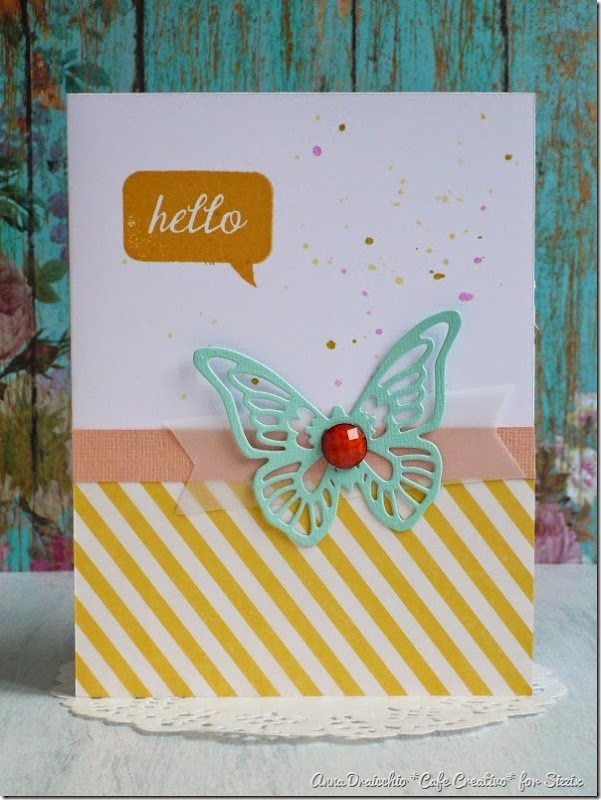
For this card, I used a piece of patterned paper layered on a card base. I dropped a few drops of spray ink.
I glued a strip pale pink and vellum also. Then, I just added my sweet butterfly that I cut out with Thinlits die. I added a stamp speech balloon to finish.
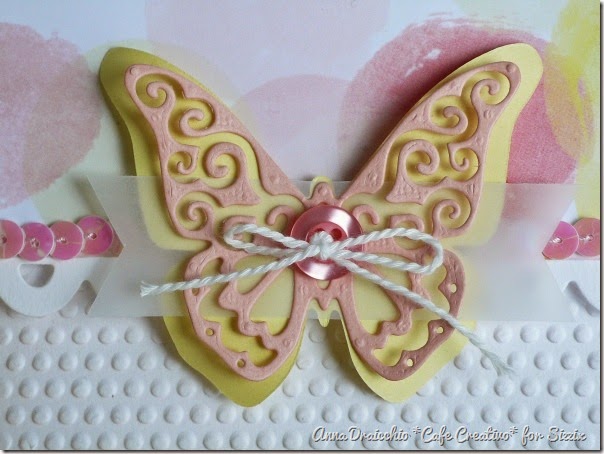
For my second card, I embossed the front card with Textured Impressions Embossing Folder included on Starter Kit. This one is very big: A4 size! Very helpful to make more cards at a time.
Then, I took a piece of patterned paper and I cut out the scallop border with Thinlits. I used foam tape to give select shapes dimension.
To make the butterfly I cut out the yellow shape with Bigz L die and I cut out the pink butterfly with other Thinlits. I added a button, some sequins and the sentiment strip to finish.
When you making card to give as a gift, why not make two, three or four different colours to put in your box. The cards will be ready for other gifts ;)
These are just a few ideas to get you started to use your butterflies of starter Kit. I'm sure there are a million more ways!
Thanks for stopping by :)
Items used:
cardstocks
patterned papers
vellum
stamps
spray ink
ink pad
sequins
twine
buttons
foam tape
Per le amiche italiane! :)
Buon 1° Maggio a tutti!
Sono Anna ed oggi sono qui per condividere due card, che ho creato con il nuovissimo Big Shot Plus Starter Kit.
Sono Anna ed oggi sono qui per condividere due card, che ho creato con il nuovissimo Big Shot Plus Starter Kit.
A chi non piacciono le farfalle? Bè a dire il vero nella mia mia vita ho trovato almeno due persone che le farfalle non le amano troppo ;)
Ad ogni modo, credo siano molto amate dalle “ragazze” di ogni età, così oggi volevo mostrare come è possibile fare un biglietto davvero carino, mantenendo la card abbastanza semplice e aggiungendo solo una farfalla, con un effetto molto decorativo.
Le farfalle che ho usato in questi due biglietti, sono state fustellate con tre fustelle incluse nel nuovo strabiliante Starter Kit, come vi dicevo!
Per la prima card, ho incollato un pezzo di carta scrap a righe su una semplice card bianca. Ho "macchiato" con qualche goccia d'inchiostro colorato.
Ho incollato “al confine” una striscia di colore rosa pallido e posizionato una striscia di carta da lucido. Poi, ho semplicemente aggiunto la mia dolce farfalla verde acqua, che ho tagliato con una delle fustelle Thinlits contenute nello Starter Kit. Infine ho aggiunto la timbrata con il fumetto.
Per la mia seconda card, ho embossato la parte anteriore con la mascherina, inclusa anch'essa nello Starter Kit. Questa in realtà è una “mascherona” :D perchè è molto grande, essendo in formato A4! Devo dire che è molto utile se si devono fare più biglietti alla volta (come per comunioni e cresime ad esempio), perchè aiuta a velocizzare di molto il lavoro. Provare per credere! ;)
Tornando alla card, ho ritagliato anche qui un pezzo di carta scrap ed ho poi fustellato il bordo smerlato con una Thinlits, sempre del Kit. Ho usato un po' di scotch spessorato per dare volume e profondità.
Per fare la farfalla ho tagliato prima la forma più grande gialla con la fustella Bigz L e poi la farfalla rosa con un'altra Thinlits. Ho aggiunto un bottone, alcune paillette e l'augurio... et voilà!
Quando dovete fare una card da regalare, abbastanza semplice come queste, perché non farne due, tre o quattro con colori differenti, da tenere da parte. I biglietti saranno così pronti per altri regali ;)
Queste sono solo alcune idee per iniziare ad utilizzare le farfalle contenute nello Starter Kit! Sono sicura che sperimentando troverete un milione di altri modi!
Grazie per la visita :)
A settimana prossima
Materiali:
cartoncini
carte scrap
carta da lucido
timbri
inchiostro spray
inchiostro tampone
paillettes
spago
bottoni
scotch spessorato


No comments:
Post a Comment